


Office Gaming Shelves Mounted Roadmap
Free
Level up the wall above your desk. Build two mounted shelves from scratch in 4, 5 or 6 ft on black steel braces. You can do this build.
About this Roadmap
Some links below are Amazon affiliate links (paid links). As an Amazon Associate, CorpsThree earns from qualifying purchases.
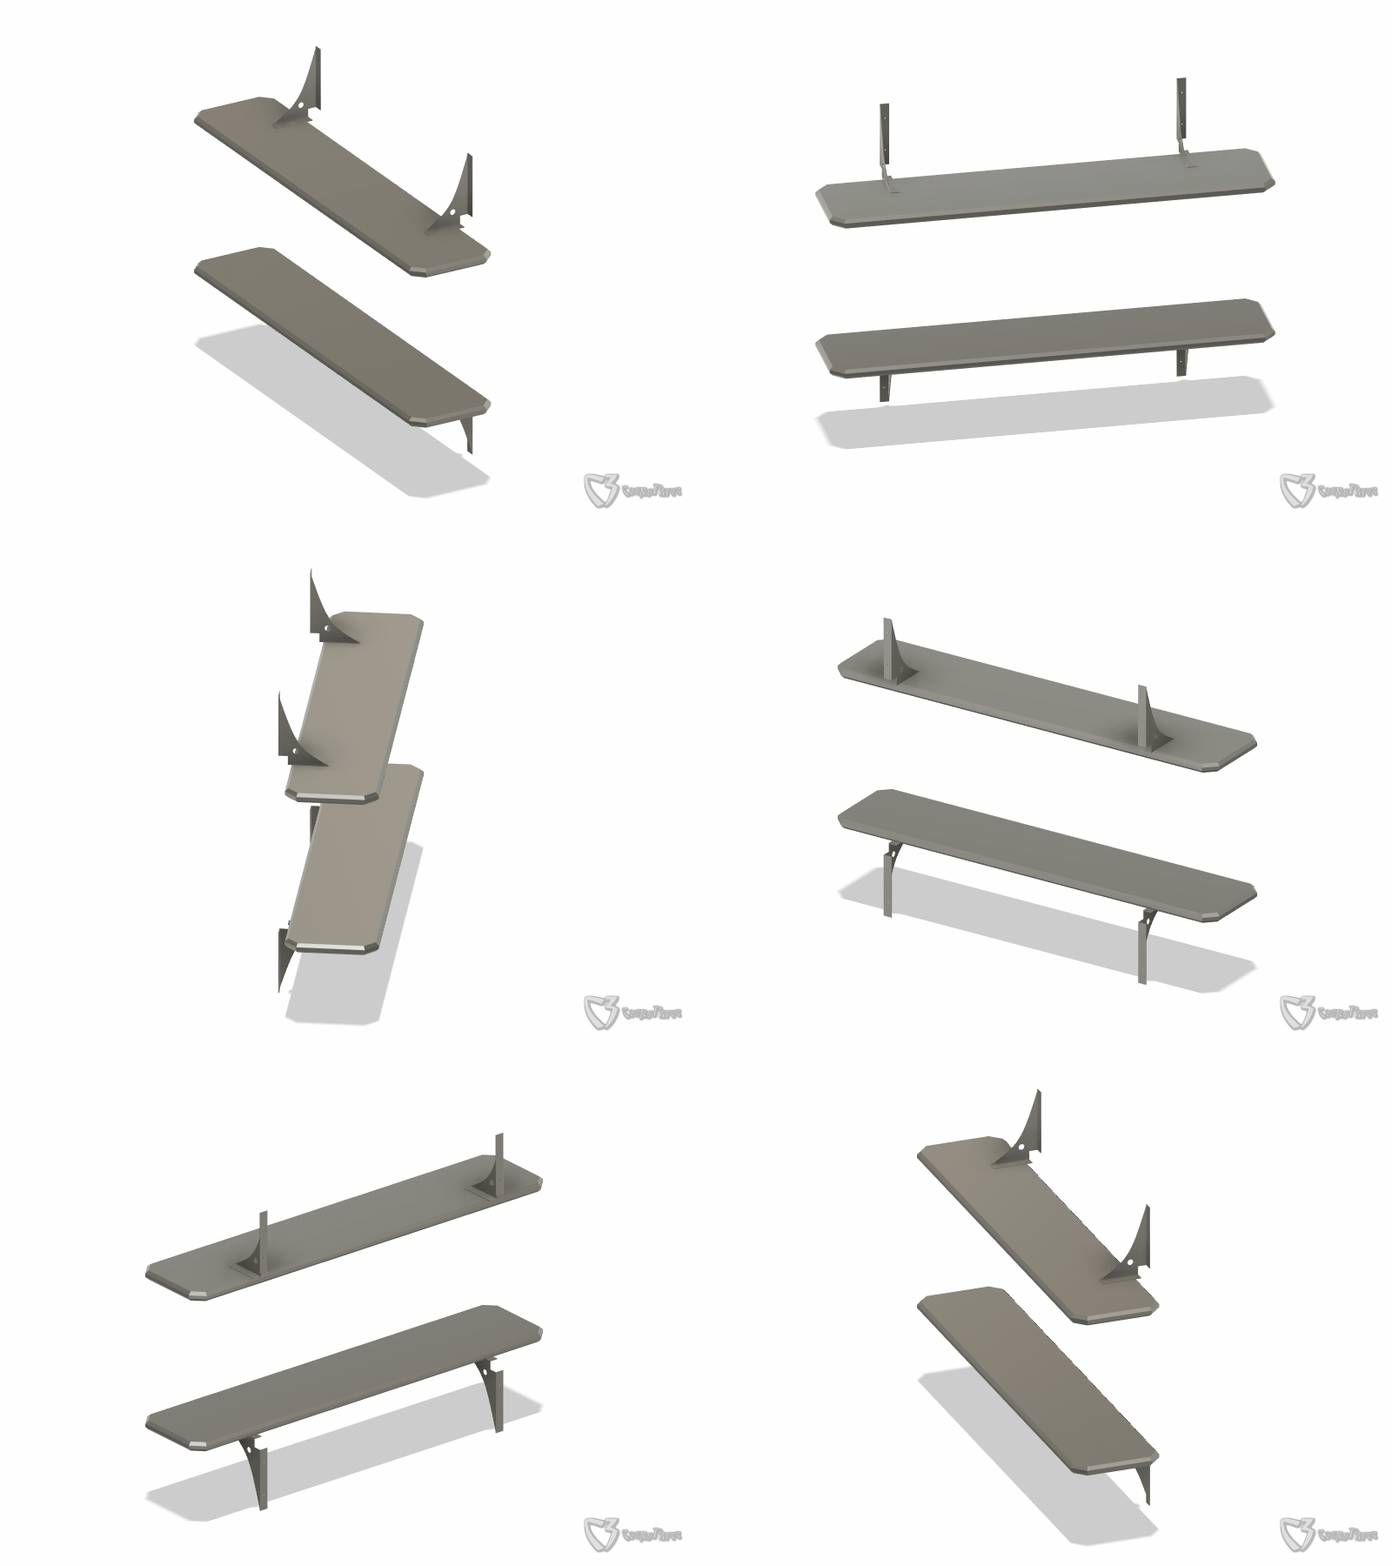
Two 6-foot mounted shelves for an office or gaming setup, cut from one edge-glued board and mounted over the floating desk on four FastCap SpeedBrace 8x12 black steel braces in the OpenSpan layout: the upper shelf's braces mount upside down above it, so the space between the shelves stays open. The monitors hang upside down from the lower shelf on VIVO arms.
Shelf size: two shelves, each 72" long x 14.9375" deep x 1.5" thick
Depending on the length of material you have, adjust the shelf count and dimensions. The Roadmap covers 4, 5 and 6 ft shelves.
Heights: lower shelf bottom 56" from the floor (26" above the desktop), upper shelf bottom 82", about 26" bottom to bottom (about 24.5" clear). Space them further apart for larger items or an open area like a cork board (try these cork board tiles or hexagon LED panels).
Ceiling: OpenSpan is designed for 8-foot ceilings, with the top braces at about 95.5 in, and it works even better with the 9-foot ceilings in newer homes.
Wall gap: each shelf sits 2" off the wall
Skill level: Intermediate (you need to find studs and chamfer the edges)
File: 15 pages, PDF
Materials list
Everything to buy for two shelves. Click an item name to open its store page.
Many of these products come in other colors. Pick what fits your setup and your stain.
01 Cut the board in two lengthwise to make both shelves from the same board.
1 x RELIABILT 1-1/2 in x 30 in x 6 ft stain grade edge-glued spruce project board (Lowe's) 72" x 30" x 1.5". Rip it in half for two 72" x 14.9375" x 1.5" shelves. Or use the Mastercraft 5/4 x 24 x 6' Edge Glued Board (Menards) for 12.3125" deep shelves.
02 4 x FastCap SpeedBrace 8" x 12", black (SB-8X12BL) 12-gauge (0.1046") steel: 8" shelf leg, 12" wall leg, 1.5" x 1.5" notch, one cable hole. Two per shelf; OpenSpan mounts the upper pair upside down.
03 FastenMaster HeadLOK 2-7/8" screws Heavy-duty lag-style, into studs. One per hole.
04 SPAX #8 x 1-1/4" Wafer Head T-STAR HCR-X screws 1 lb box (Lowe's). Up into the lower shelf, down into the upper shelf, one per hole.
05 Minwax Gel Stain, Oil-Based, Coffee Interior stain, Quart, 4-pack (Lowe's).
06 Minwax Polycrylic, Satin, water-based, 32 fl oz Protective finish (Lowe's).
07 For a lighter, natural finish: Osmo Polyx-Oil 3043, Clear Satin. It soaks into the wood instead of sitting on top like a plastic film, brings out the grain with little color change, doesn't yellow light woods, resists water and spills, and can be spot-repaired. It replaces both the stain and the Polycrylic as a one-product finish, and goes on with a cloth, pad or brush. The smaller can is probably enough for one desk or a pair of shelves.
08 Monitors: 2 x VIVO STAND-V101H single monitor arms (Amazon) They mount upside down under the lower shelf, one arm per monitor, so the monitors float over the desk. The AVLT dual arm stays on the desk and is not part of this Roadmap.
The desk has its own free Roadmap: Office Gaming Floating Desk Roadmap (4 or 6 ft). Building 8 ft? The free Office Gaming 8 ft Floating Desk and Shelves Roadmap covers the desk and shelves together.
Tools You Need
1. Drive and drill
Drill/driver (high-torque for HeadLOKs). Used for this build: Metabo HPT 18V MultiVolt Triple Hammer BOLT Impact Driver WH18DC (Amazon)
T20 star bit (comes with SPAX)
Spider drive bit (comes with HeadLOK)
2. Measure and mark
Franklin Sensors ProSensor M210 stud finder (Amazon)
4 ft level
Tape measure and pencil
3. Cut and shape
Saw for the rip and the corner cuts. Used for this build: Metabo HPT 36V MultiVolt 7-1/4 in Circular Saw C3607DB (Amazon)
Router with a 45° chamfer bit for the 1/2" chamfers. Used for this build: Metabo HPT KM12VC 2-1/4 HP Fixed/Plunge Base Router Kit (Amazon)
Router bit: 1/2 in Chamfer Bit from the RYOBI 24-Piece Router Bit Set A252401 (Home Depot)
Clamps
4. Stay safe
Safety gloves, safety glasses and hearing protection
Steps
Part 1: Prep
Prep both shelves before anything goes on the wall.
1. Split the 6-foot board: Split it lengthwise into two shelves first (0.125" kerf), about 14.9375" each, so all the chamfers match.
2. Cut the corners: Cut 2" x 45° off all four corners of each shelf.
3. Chamfer and finish: Rout a 1/2" x 45° chamfer on all top and bottom outer edges and corner cuts. Sand and finish.
Safety gloves and safety glasses are required when using tools.
Dimensions: shelf heights over the desk
Shelf heights: Desktop 30" from the floor. Lower shelf bottom 56" (26" above the desktop), top 57.5". Upper shelf bottom 82" (about 26" bottom to bottom, about 24.5" clear), top 83.5".
Your height, your call: every CorpsThree Roadmap puts the desk top at 29 in, close to a typical dining table, but you can go lower or higher. Space the shelves further apart for larger items or an open area like a cork board (try these cork board tiles or hexagon LED panels).
Shelves and braces: Each shelf is 72" x 14.9375" x 1.5", 2" off the wall. SB-8X12BL braces at 12" and 60" from the left; the 8" leg ends about 8.9" short of the front edge. OpenSpan: upper braces upside down, top braces at about 95.5". Designed for 8-foot ceilings, even better with 9-foot.
Heads up: The brace positions match the studs on my wall and the desk brackets below. Line your braces up with your own studs instead of copying these positions exactly.
Part 2: How to install the OpenSpan braces and shelves
Find the studs: mark the studs at the brace positions, 12" and 60" from the left (48" apart on 16" centers), matching the desk brackets.
Mark the lines: mark a level line for each shelf bottom, 56" and 82" from the floor (about 26" bottom to bottom, about 24.5" clear). Go further apart for larger items or an open area like a cork board (try these cork board tiles or hexagon LED panels).
Lower braces and shelf: 8" leg flush to the 56" line, 12" leg down the wall. Drive heavy-duty lag-style screws (FastenMaster HeadLOK 2-7/8" structural screws) through the wall leg into the studs, one screw per hole. Set the shelf 2" off the wall and drive SPAX #8 x 1-1/4" screws up through the shelf leg into the shelf. Fill every hole.
Upper braces, OpenSpan: mount them upside down above the upper shelf: 8" leg level at 83.5" (the shelf top over the 82" line), 12" leg running up the wall to about 95.5". HeadLOK screws through the wall leg into the studs, one per hole.
Upper shelf: hold it tight under the 8" legs, back edge 2" off the wall, and drive SPAX screws down through the shelf leg into the shelf, short enough not to come through the bottom. Fill every hole.
Monitors: mount the VIVO arms upside down under the lower shelf.
Safety: safety gloves and safety glasses are required when using tools.
Tip: Check each shelf for level side to side and front to back before you drive the shelf screws.
Tip: Always hit the studs, and pre-drill a properly sized pilot hole for every lag screw so the stud doesn't split.
Brace positions shown match my studs; yours may differ.
Optional extras
Some links below are Amazon affiliate links (paid links). As an Amazon Associate, CorpsThree earns from qualifying purchases.
Monitors and lighting
Many of these products come in other colors. Pick what fits your setup and your stain.
Lighting
Optional material: Twinkly Dots 60 LED, black wire, app-controlled RGB string lights (Amazon), the same lights as the desk. Twinkly Dots come in 10 ft strings. Every setup is a little different, so measure the edge you want to light and pick the number of strings that works for you.
Run them along the shelf chamfers so the effects glow on the wall.
Stick them on with Gorilla Permanent Adhesive Dots (clear, double-sided, 0.5 in). They are USB powered.
The free Twinkly app has lots of options, like effects, music sync and holiday looks. They also sync with Razer Chroma for gaming.
Monitors
Monitor arms: 2 x VIVO STAND-V101H single monitor arms (Amazon).
They mount upside down under the lower shelf, so the monitors float over the desk.
Choose a single or dual setup: one VIVO arm for one monitor, or two arms for two monitors (I used two).
Use screws short enough not to come through the 1.5" shelf top.
More extras
Cork board option: Fluxynara Hexagon Felt Bulletin Board Tiles (12-pack, Nordic Slate) (Amazon). Fills the open OpenSpan gap as a pin board for notes and photos.
Fun idea: alternate the cork board tiles with hexagon LED panels for function and lighting at the same time.
Power, cable and mic extras are in the free Office Gaming Floating Desk Roadmap.
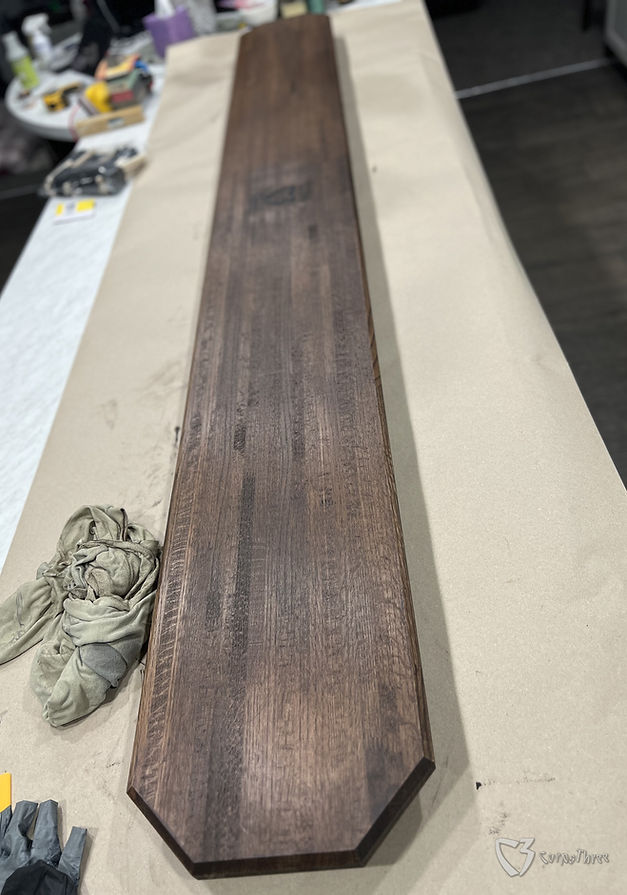
Shelf stained and finished, before it went on the wall. This is an example of an 8-foot shelf.

Shelves with LEDs installed and ready to use. This is an example of an 8-foot shelf.